If you love black and white photo than I hope this today tutorials will belongs to you, hi everyone my name is Bima thank you for visiting my blog. I’m shooting wedding since 2009 and travel around the world to shoot portrait, engagement, and surely the wedding for the most awesome couple on earth. In fact, some of my friends not only asking me about how I use my blog to get overseas client but also asking more about Photoshop action in detail.
If you already run photography hobby or business over than years than this article might not belong to you but just if you still want to learn something new or even you just starting your photographer career than I think I could deliver great information for you.
Before I learn about photo retouching in detail,
I really HATE Photoshop!
What I’m thinking during previous time is this software is too difficult to learn, here we’re not only stumble about their features but also getting stuck about layer and layer that might be confusing for some newbie, and hell yeah I ever feels that too.
So my quote is,
Don’t hate something too much because lately you gonna love it for sure and this me right now, I love Photoshop so much and I love for being stumble for 30 to 40 minutes retouching my wedding photos by using Photoshop.
By the way few years ago I flew to Jakarta to have a 4 generation portrait session from Citra and Budi family, things that become very interesting is on that day I could capture the great grand ma so it seems to be very special session that this family had in their entire life. And what I’m going to share today is about how to make a regular photo into black and white photo by using Photoshop CC. Generally no matter what you have now, it could be the earliest or latest Photoshop series than you still can follow my guidance because working with Photoshop is generally all same.
How to Retouch Black and White Photo by Using Photoshop
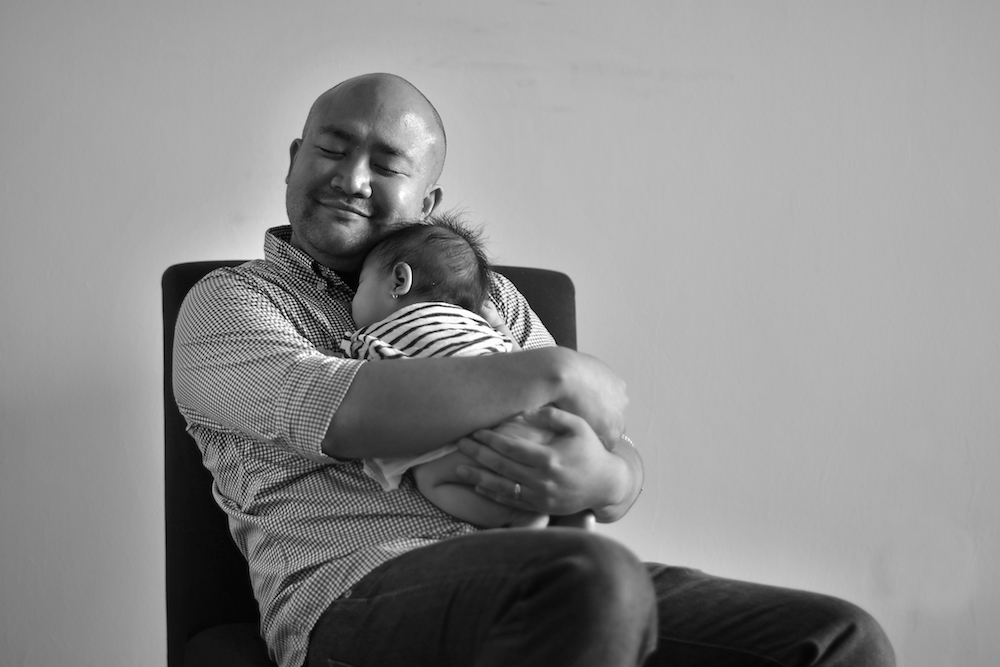
Lets get into the main point, so today I’m gonna retouch my photo below…
After an hour of my session I found Sofi, the daughter is looks so sleepy and I know that it becomes one great moment for sure. I go to the living room and get a single black fabric sofa in it and ask Budi to sit there while hugging his sleeping daughter at the front of chest. I ask Budi to close his eyes and feels the wonderful memories of it and Boom! we get one special pictures that will means a lot for the next decades.
Since this photo looks classic so I really want to make it as a black and white photo during the post production and this is the steps to make it happen.
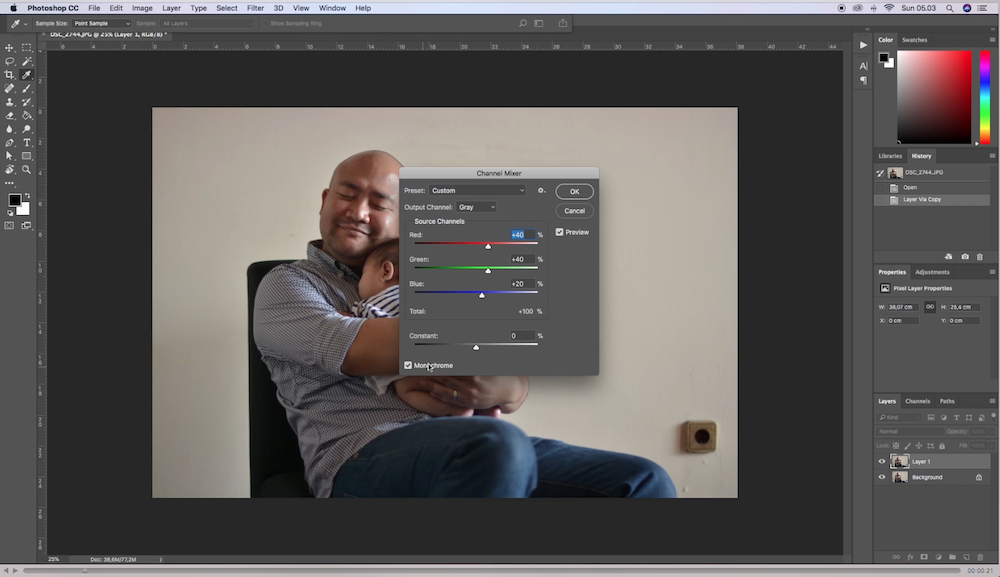
1 – Convert It Into Black and White
I open the files and directly convert it into black and white photo by using the “Channel Mixer” and simply click the monochrome tick form. Even there are other few options to make colour photo into black and white but using channel mixer is the easiest steps that I could telling you now. Once you have your black and white photo than you could start your cool Photoshop action now because the rest steps that you gonna do are just adjusting and fixing everything that belong to your concern.

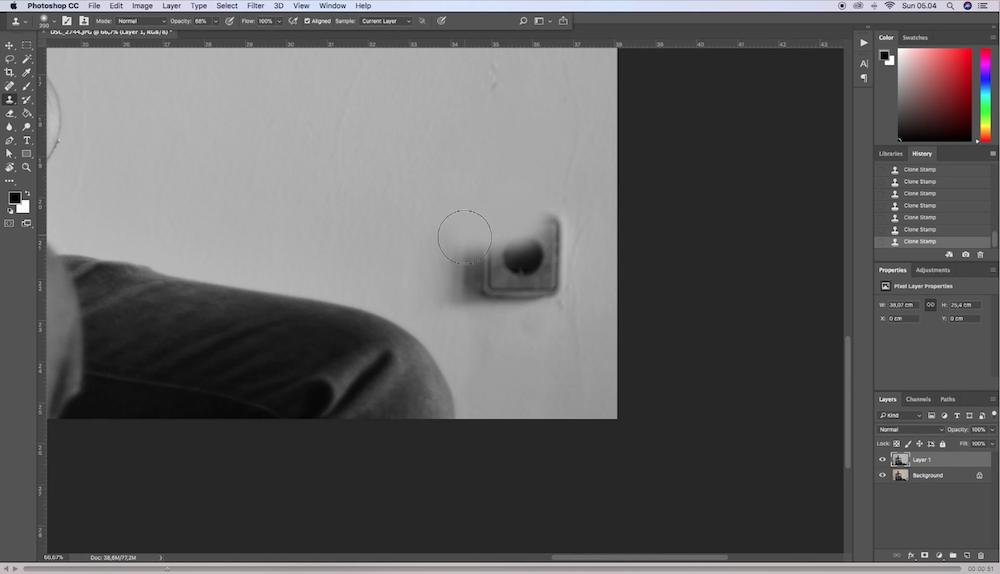
2 – Erasing the Electricity Socket
You can see clearly about something that seems not to be Ok in this portrait photo and there is an electricity socket in the right corner so I choose to erase by using the “Clone Stamp”. Since I got super clear white cream background behind Budi than my action of using clone stamp will so easy. I set the round in small and zoom in and erase the socket slowly. Don’t take to rush when using this feature because you must be concern about the round opacity so you will get super smooth final editing result.

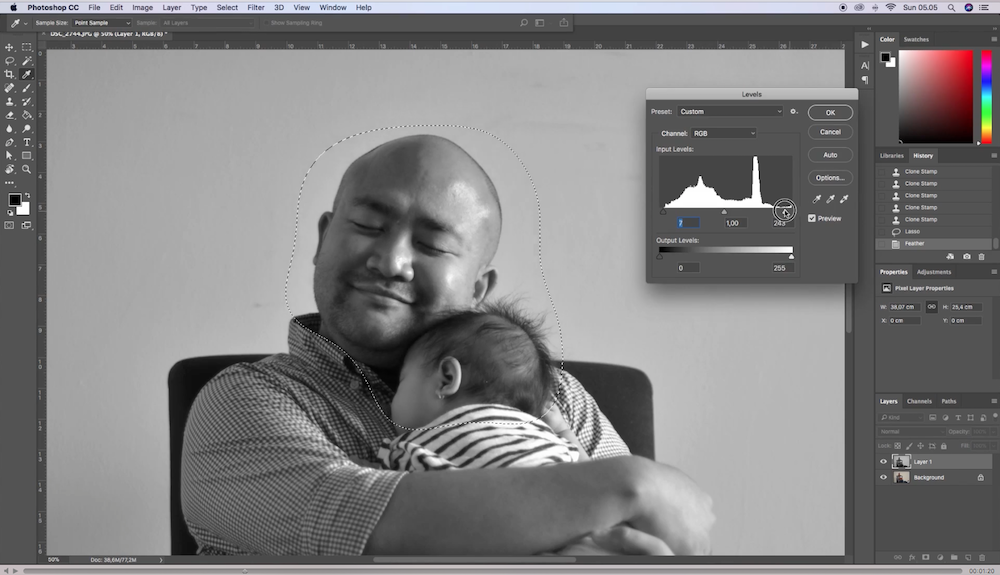
3 – Adjusting Some Parts in Detail
If you see my previous Photoshop tutorials than you will see that I using Feather Selection to select some parts and adjusting everything in super smooth and detail. This feature is really important because if you’re not using it than you will get harsh selection that will broke your photo for sure. The hardest thing is there is no fix clue about the number of feather adjusting so you could try by your self but due to my experience, if you select for big part than set it up around 100++ will be better.

Through the photo above you see that I’m working on Budi and Sofi’s face so I selected around their head and make it smoother by using feather selection than using “Level” or CTRL + L to set brightness. It gonna be super easy to do even you just newbie on this skill and more practice everyday will make you better than ever.
To make this tutorials clear than don’t miss to watch my video tutorial below!
How to make BLACK AND WHITE PHOTO of Father and Daughter with Photoshop CC
Dear photographer friends, today I wanna share what I did during post production my previous portrait session. It was 4 generation portrait actually but on t…
Wanna Get My Step by Step Photoshop Tutorials?
If you want to get more specific video while see what I’m doing step by step in REAL Photoshop action that I highly suggest you to download my full series of Photoshop tutorials. On that tutorials below, I will telling you about retouching the beautiful bridesmaid while I’m shooting wedding in Bali. You will see directly how I use Photoshop starting I open the files and adjusting for everything on that photo.
So this is the end of my black and white photo retouching tutorials and I hope it works on your business. If you got any question than I will feels welcome to answering your comment below. Thank you for visiting my blog and I’ll see you again on another photography tips….Bless and love!


