Hi talented photographers my name is Bima and today I wanna share to you about how to photographs Indonesian breakfast with entry level mirrorless camera.
If you have a better camera no matter it’s a mirrorless or DSLR than you surely able to use it but I know some of you might not have a professional camera so today I wanna share to you about shooting in a good way with an entry level mirrorless camera that you can buy for less than $500.
I know that everybody love food!
When you love food so much than you have a passion about it no matter about cooking, making a food book, creating a local food catalogue or any other purposes than I sure that you have to know more about how to photographs your food properly.
Don’t worry if you don’t have any nice and pretty studio or having any DIY studio box because here I’m gonna shoot right on my home just by using table, cheap paper background, and surely the available light, so I hope you guys read for this cool tutorials and let’s dig in.
Lists of Indonesian Breakfast That I’m Going to Shoot Today
My wife Nina is so wonderful and today she cooked a tasty food for us to get breakfast. When you ever visiting Indonesia than you might know that we love heavy food for whole three times meal. What I’m going to say here is our main food ingredients is rice so no matter it’s breakfast, lunch, and dinner than almost Indonesian family will have a white rice on their dining table.
Just in case you are curious about what kind of food that I’m going to shoot today than this is all these 3 lists:
Pecel – Classic Indonesian Salad
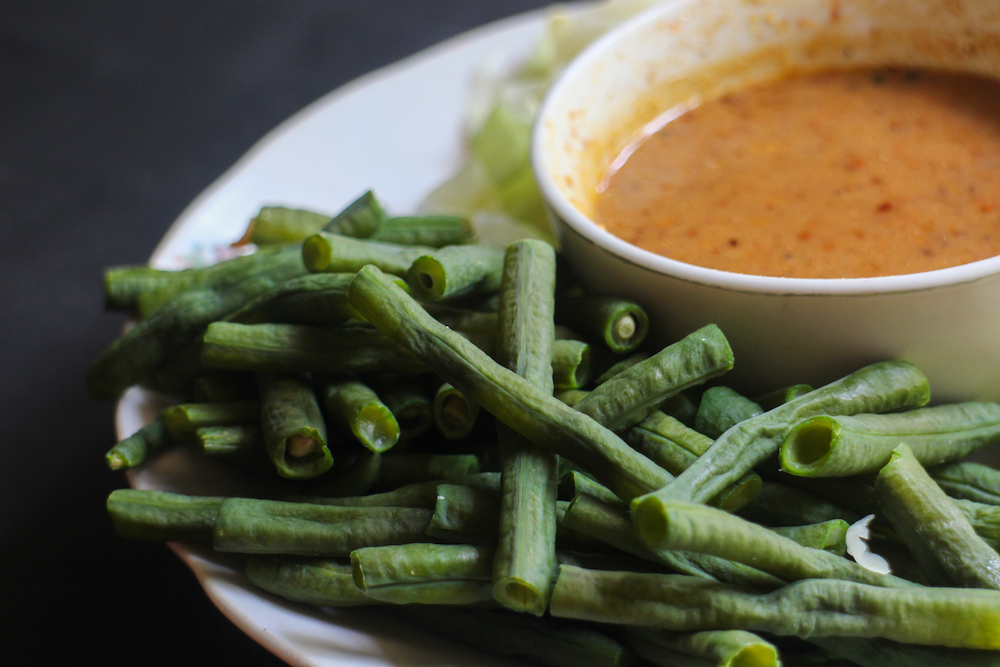
Pecel is one of the most classic Indonesian salad that you can find in almost small restaurant in Java. The good thing for having this healthy dish is you can make it by your own and mix all the vegetables that you have in the fridge. Generally people will serve Pecel for breakfast and lunch where they will provide a bean sprout, long beans, spinach, and carrot but today my wife only bought a simple vegie such as long bean and cabbage.
One thing that will really essentials for serving Pecel is you have to provide a peanut sauce for the topping and since I love the spicy one than my peanut sauce today have a bit spicy taste for sure.
Fried Tempe
My second dish that you must know is Tempe, it made from bean and yeast that fermented for a night before it can be consume for food. When you visiting Indonesia than I highly suggest you to find and try fried Tempe. I know that it’s cheap that cost for less than $1 for each and it seriously fresh and tasty.
There are various way to cook Tempe in Indonesia such as deep fry, stir fry with some vegetables on a non-stick pan, and bacem a typical for cooking tempe when you love a bit sweet taste. Today I’m asking my wife to cook this tempe on a deep fry so it is really simple and fast.
Fried Noodle
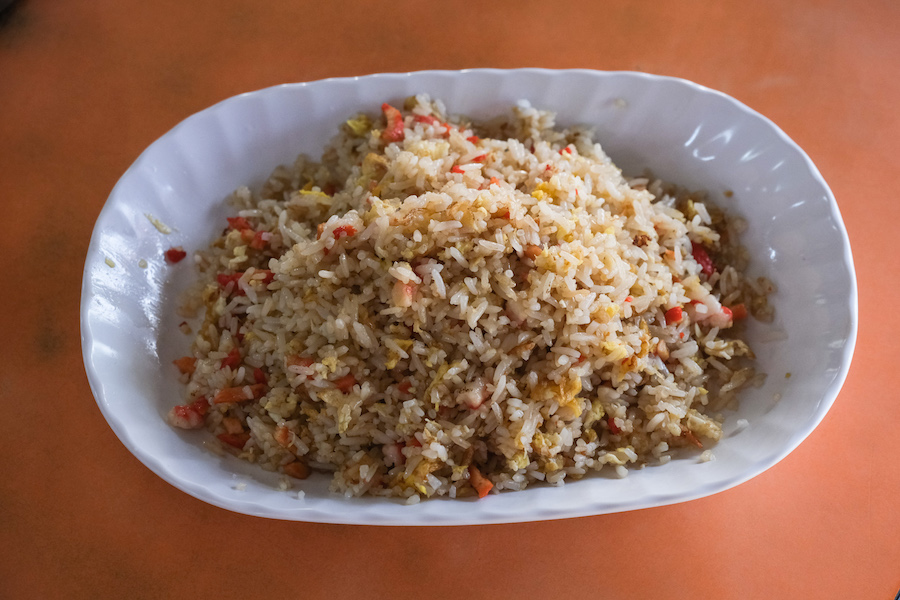
The third meal that I’m going to eat this morning is a fried noodle, who doesn’t love it? I just bought a dry noodle yesterday on a nearest groceries from my home and my wife cook it in a simple way with chop of garlic, egg stir fry, and chop of spring onion, really simple, cheap, and fast.
Remember that I have a peanut sauce for my Pecel’s topping above? you must try to eat this fried noodle with a peanut sauce too, it’s really classic and gourmet.
Gears and Props. Preparation
I know that some of professional food photographer will need a good gears and well props for shooting some meals but today I wanna make this session as simple as I can by guide you to shoot like me with any gears and simple props that you can find on the nearest store or simply buying on Amazon.
If you want to know how to photographs foods and beverages properly than you may have a passion about it, than once you get it on your own than you can continue about choosing your perfect entry level mirrorless camera or having your smartphone for mobile photography.
As I said on the title that today I wanna shoot this Indonesian breakfast meal by using an entry level camera from Canon called EOS M.
Camera with Canon EOS M
I’m not going to use the latest series of EOS M even you may use it too but here I only use my first generation mirrorless that I bought in 2014 but still works so great for working in a microstock photography. What I love about EOS M is this camera come in tiny body, strong grip on my hand, and surely made by light wight materials.
No matter what kind of mirrorless camera that you use but understanding your camera at the first time is really important. I brought this EOS M to so any countries for making a simple behind the scene video, taking a snap photo before I’m shooting wedding, till capturing still life product in microstock photography niche.
Go look at my camera above in a quite detail because you will easily see there are few scratch on the body since I bought few years ago and brought to all photo session that I have both in wedding and portrait. In fact this EOS M still works great for photo and video.
Lens with EF-M 18-55mm f3.5-5.6
When I bought this camera, I got good bundle package of camera body, 22mm fixed lens and EF-M 18-55mm f3.5-5.6 wide lens so totally I got 2 lenses on the package. Today session will need a fast improvement for sure so I choose to put this EF-M 18-55mm f3.5-5.6 on the camera so I can adjust the range and aperture in a simple way.

Look at this Lux* South Ari Atoll resort photo below and yes I use the EF-M 18-55mm f3.5-5.6 on the camera.
Sun is shining so hot during my pre wedding session in Maldives but few hours before I start the session I try to walk around the resort where I stay and capturing some beautiful spots for my references and in the same time my wife, Nina, is doing her best work for make up and hair do.
Table
You will seriously need a rigid table for shooting on microstock and in this case you may use any kind table that you got at home or using wood table top for placing your objects. Here in my house I only use my round glass table that use by my mom for placing a flower vase in the corner.

Black Paper Background
The last thing that you will need on shooting food and beverages in a black paper background. Most of the paper will come in a full black colour but just in case you get a paper that come in two colour, usually black and white than it would be great.

Shooting for food, beverages, or any kind of organic vetegables will looks so wonderful if you put a black paper background on it, it seriously bring all the colour and contrast stand out among the others.
Tutorials About How to Photographs Foods
When you want to learn more about how to photographs food and beverages in a simple way than I do have few guidance that might help you to work on it, so let me share to you below.
Using Available Light
Having an available light is one good thing that you must be consider and to make sure that you have a good light for shooting than put your self in some space that will directly accepting a sun light such as near the door and window.
When I made my DIY studio box by using an instant noodle box than I still using an available light to shoot instead installing electricity socket like what you will get on Amazon DIY box. You might face a little bit challenge by using an available light because you can not control the light as same as you use a studio lighting set.
Maintain Your Camera’s Aperture on a Higher Number
When you shoot for food or beverages than it is really important to set your camera’s aperture on a higher number. When I shoot for this Indonesian breakfast meal than I set my aperture on f7.1 than continue with 1/60 of exposure time and ISO 400.
When you let to shoot for food and set your aperture on a lower number such as 3.5, 2.8, or lower than you will also get a sharp image but there will be a blur effect in some part. Set your aperture on a lower number surely will give you another perspective of photos but in my opinion when you let to shoot on a higher aperture number than you gonna get sharp photos in all parts.
Choose the Right Background
Having a nice background for your food is also essential, in a common way you can choose to put a solid colour paper like black and white even in more further you also can consider to have another colour or textured materials like wood, cement, or any other else.

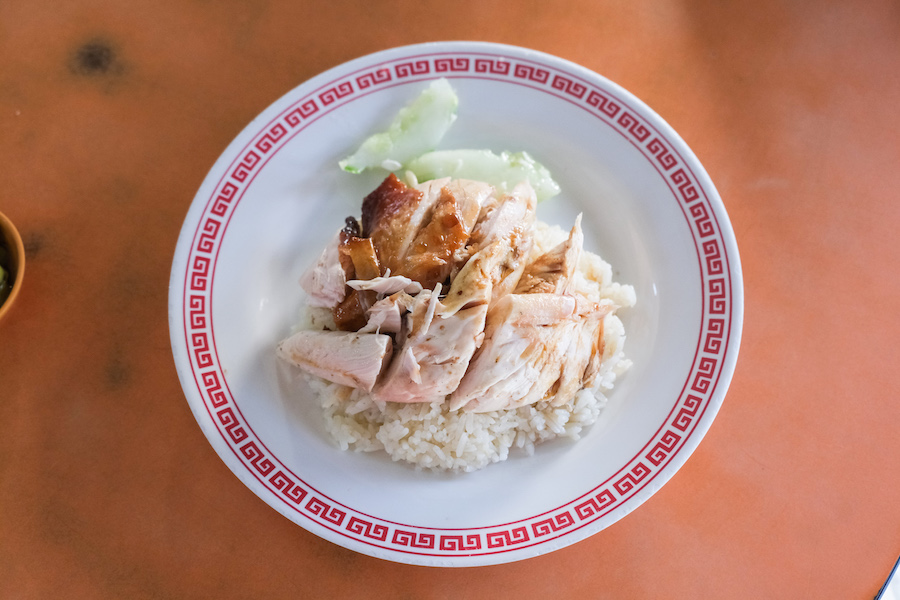
Let improve your creativity by consider of existing background like dining table on the food court or canteen where you are belong. Several months ago I went to Singapore and eating for lunch in such local restaurant and they have a good table where I can shoot my meals before eating, it’s a nice background actually and when my friend asked me about how to photographs that photo with so natural than I only answering that “I’m using my table”
Now look at these photos below, it’s nice and sharp and yes I also use an available light for real.
It Also Nice for Put Some Negative Space In It
In a simple word, negative space is almost similar than a blank space on your photo where it will come with several reasons.
- UNIQUE PHOTO COMPOSITION – When you put a negative space on your photo than you will see kind of uncommon image where surely come in a good perspective. The good thing about this technique, you are still able to shoot from front, above, or lower angle so negative space still can be made with various angle
- LET PEOPLE PUT SOME TEXT ON IT – When you shoot for microstock photography like me than having a negative space will let anyone who buy your images to put some text, quote, or any accessories and vector in a designer mind perspective.
Let me guide you with two images below,
Other “How to Photographs” Tips and Tutorial from Me
I hope you got inspiration following reading my post here but just in case you still need another “how to photographs” and tutorials from me than you might consider to see several links below:
Once again thank you for stumble upon my blog and read this today tips than I hope you enjoy and get inspire from it, cheers, BZ


