If you don’t have much money but seriously love about capturing moment than you can consider to buy cheap photography gears for your first equipment. I know so many people might telling you to not working as a photographer because it is tough job or you must spend thousand of dollars just to make your 1st dollar but today I wanna tell you that…
It’s ain’t true!
Dear photographer fellas my name is Bima and thank you for visiting my blog, I’ve been spending over than a decades to be a wedding photographer for cross over country client and I love to share for what I’m doing in this industry and give a simple solutions and tips to any friends and readers who want to start their photographer career.
One good thing that you must know is you always can start ANYTHING with a small things. No matter you gonna work as a photographer, businessman, or any other job but there are always some ways where you can buy some goods or equipment without burning the whole money. When you work as a professional photographer than you might spend thousand of dollar on photography equipment but that’s not what I’m going to telling you today because everything on this post is about real guidance of buying cheap photography gears for your own.
What I’m going to telling you is no matter you going to earn money as a photographer or you simple someone who love taking pictures than this cheap photography gears will help you to start your passion in an affordable way.
If you want to start photography business on your home than you can consider three cheap photography lighting set up that I commonly use for making vlog or shooting small objects that I usually sell on microstock platform.
Understanding Cheap Photography Gears for Basic Uses
In fact, cheap photography gears is not that bad as long as you can use it properly. Here in photography you are not only pushing the camera shutter but also understanding how to optimize all your gears to capturing moment or creating images that you can sell directly to your clients, as a digital download, or bundle it as a company profile details.
I know for sure that get in touch in photography industry in a professional way will bring you into a moment where you must spend on expensive gears but if you just starting your business or even you are still don’t really sure either you can do it for long term or not than buying cheap photography gears will safe your financial life.
I got few of friends who spend over than $5,500 of photography equipment and ended up without knowing how to use it because they don’t really learn about this industry by reading some books or taking their life into the next level of networking where they can meet other photographers who better than them.
Reading photography books or magazine is still awesome in this digital life because you can touch the paper, stop on the page which give you better impressions and surely do it in a classic way. Kindly consider to read this books for your own.
Know Your Camera Better
How you set your camera will means so much to the result because after all camera will just a tool which gonna help you to capturing all images that passing through your eyes. If you going to choose your first camera than my early quote to you is,
No matter what camera brand you choose than all basic system inside it will all same
If you need a recommendation of choosing your first camera than I hope my previous article about best mirrorless under $1000 will help you as well but beyond that, there are few things that you must know more about. Down here I’m gonna show you how you can understanding all the basic information of your camera parts, button, and setting (which is generally same on almost all camera brand) so you will know exactly how to use your cheap photography gears properly.
12 Basic Camera Features That You Should Know
Even you just buy cheap photography gears for your own than there are always basic camera features that seems to be common and it is really matter to know about it so down here I’m gonna describe 12 basic camera features that you should know:
- Power Switch – First thing that you must find at the first time you hold your camera is finding where the power switch but please remind that different brand will seems to be in different position too, in fact this switch will really easy to find so don’t worry about it.
- Hot Shoe – Hot shoe is a part that used to be at the top of your camera body and this socket is use for placing speedlight for additonal illumination when you shoot in a low light situastion.
- LCD – All mirrorless camera will have an LCD which some of them are static but others can flip. Here you must know that using kind of camera which is not provide a view finder (small hole to see the object) will seriously need an extra battery because the battery will drain out quickly.
- Menu Button – This button will bring you into the whole camera menu where you can adjust all the features like white balance, focus mode, image quality, and etc.
- Information – This information button will directly show you about your camera system in general where you can see all the shooting style and setting in one simple screen.
- Setting – This button will give a short impression about main setting of your camera like image quality and metering mode that belongs really essentials before you shoot.
- Preview Button – You will definitely press this preview button to playback all your images and videos that you already make, some mirrorless camera will have a touch screen features too where you can swipe the image on the LCD instead using small joystick or scroller.
- Video Record Button – Simply press this button when you want to record a moment in a video format and once the recording features is active than it usually have a light beep signal that will continuously on during record process.
- Focus Sensor and Self Timer Signal – This parts will give you a guidance to find the perfect focus while you start shooting, some brand new mirrorless camera also have a smile and face detector where they will automatically get the focus when detect people’s face and smile. In other hand self timer signal will help you to aware when you use timer features to shoot something, it used to be set on 5 to 10 seconds.
- Lens Release Button – This button is lens lock to the camera body so simply press this button to release the lens from the body.
- Tripod Socket – Most of camera no matter a mirrorless or DSLR will have a tripod socket and make sure to buy only tripod that have a good materials to hold your camera. There are various tripod or even gorilla pod in the market but you must consider to buy the good one instead you want to crash your cheap photography gears that still cost hundred to thousand of dollars.
- Card and Battery Compartment – This last part is a compartment where you can placing your battery and SD card, some camera also have a different compartment but generally they will put in on the side or in the bottom of your camera body.
Just to be your personal recommendations than down here are few options of great tripod that you can consider:
Making Attractive Images
If someone telling you that only expensive camera which can shoot well than don’t ever trust them because you must believe that there is no limit for your creativity. I know you guys have a big dream for become a photographer than go start small thing, buy cheap photography gears, and keep going no matter where you are will means millions for your future.
Let’s make an attractive images for your own and let me show you some of example,
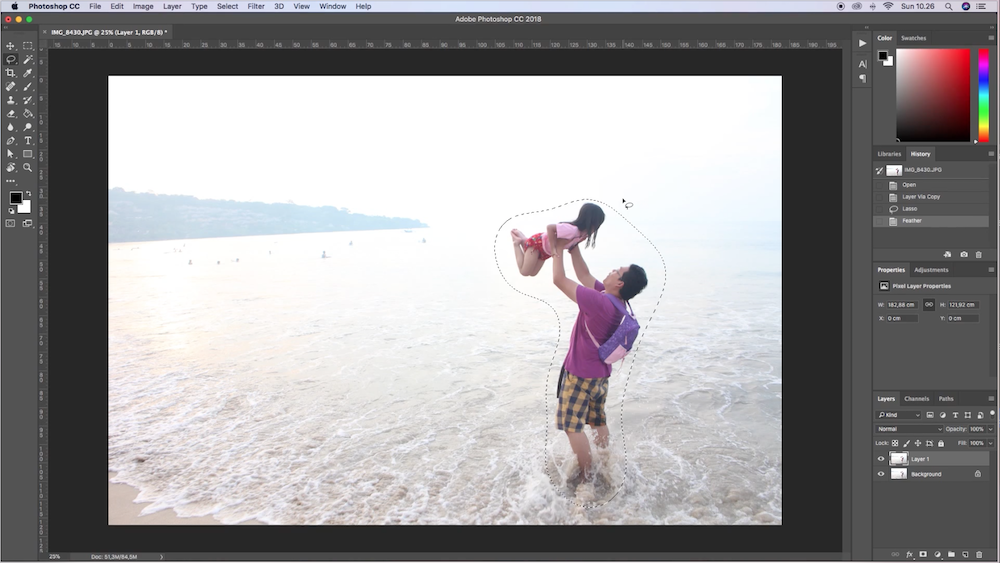
This picture below is taken by my wife who don’t know about exposure, aperture, and all those ridiculous camera setting. All she did is just set the camera on auto mode and waiting to the moment where I lifted my daughter up when we got a vacation in Bali.
Let me show you how to make the similar image like this because everything on this scene is on my setting!
Steps to Make a Similar Image Just Like Mine
As I said before that everything on scene is on my setting, so I was wondering to have a priceless image where I play with my lovely daughter when we went to Bali and what I did is asking my wife to capturing it properly. It was beautiful day with a lovely sunset view so if you have the same situation like mine than this is how to make it:
- I personally set my camera on L fine JPEG
- Get the setting for 1/200 exposure time, f4, and using 18mm range to get awesome wide angle effect
- Ask your photographer to stand by and get the camera on
- Go lifting your kid and hold it on the air for about 3 seconds
- than, Boom!
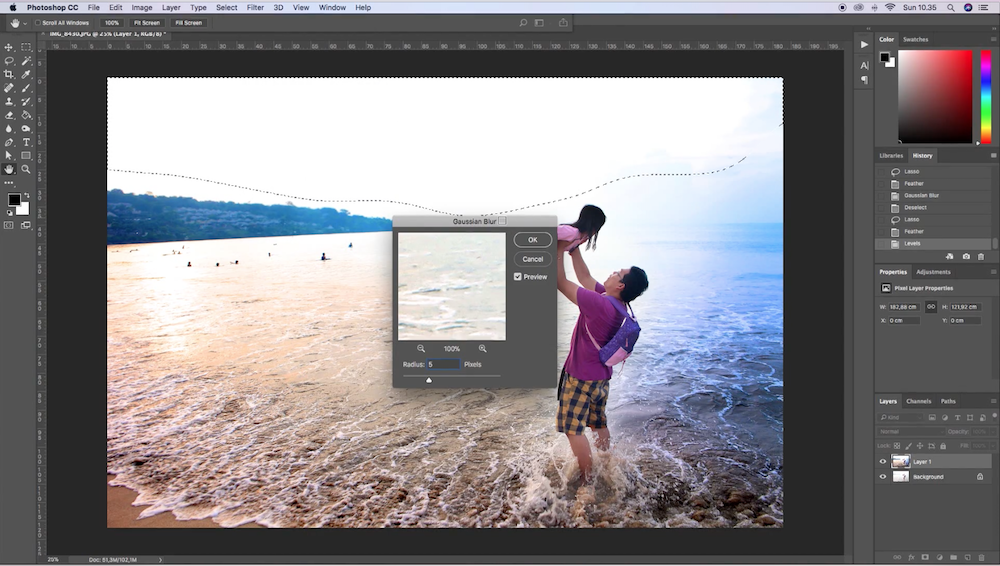
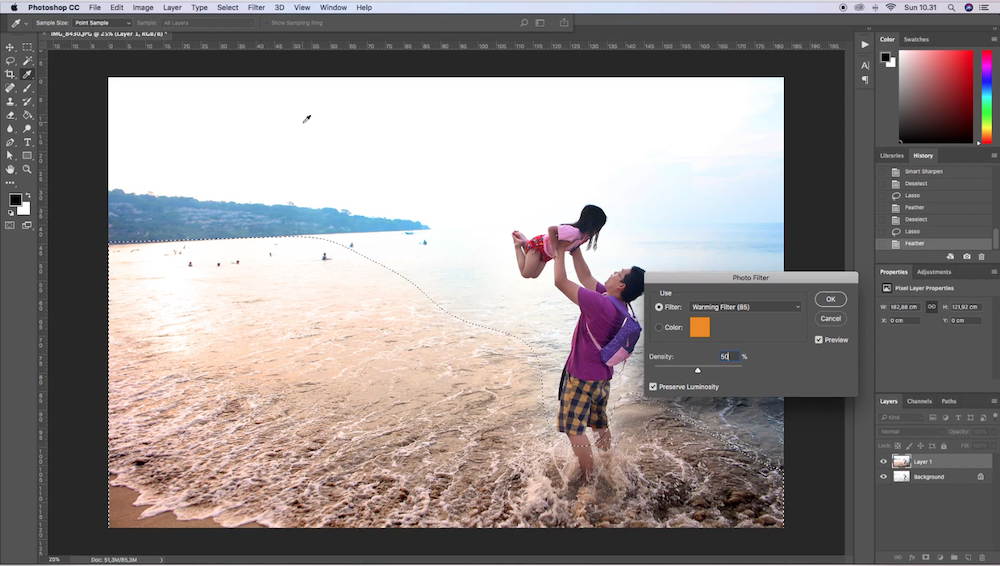
I also would like to suggest you on learning more about post production by read my previous article about self photo retouching because on that post I will share short step to retouch my above image from the beginning till finish.
If you concern on social media sharing or content creation than making a great moment while you spend time with family is one good attraction. Through this way I surely you can make similar content just like mine by using any cheap photography gears that you can afford. If I could say, here in this scene I use the first generation of Canon EOS M that you can buy for less than $200.
Than to make a great family moment with stunning landscape like beach, lake, or mountain than I highly suggest you to buy wide M lens such as Canon EF-M 18-55mm f3.5-5.6 or similar. And just in case you want to buy Canon M series lens bundle with the wide lens than you can consider to have this Canon EOS M50 Kit with EF-M 15-45mm.
Let me share to you about pros. and cons. after using Canon EOS M for over than 5 years.
Pros.
- Compact and tiny
- Sharp and clean image
- Good for traveling and use for any person who even don’t know about photography
Cons.
- Hard to get fast focus on low light
Shooting in a Downtown
Are you someone who love on street and cityscape niche? hell yeah than let me share to you about shooting in a downtown with using cheap photography gears that you can afford.
I was in Semarang Central Java few months ago just before the pandemic and this city is so wonderful. If you were here and sightseeing around the city (especially the Kota Lama or Old City) before 9 am than you will see how people are being so attractive and surely get less traffic.
If you love traveling than bring a high end DSLR camera is a great choice because you will get a high quality images for your own. But if you concern on simplicity than choosing one of these best mirrorless camera will suit on your needs. No matter what kind of camera brand that you love but simplicity of traveling need a compact gears that come with clean and sharp image than in more further this camera should be easy to put inside your bag.
I put the link about mirrorless camera above where you can choose few recommendations of best mirrorless camera under $1000 but if you want to know few of them than here is the recommendations:
Steps to Shoot a Cityscape
Shooting for cityscape is almost similar with shooting for an architectural buildings even though you will also shoot for portrait, journalism, and some details. Some camera will need several lens that will works great for architectural aspect but if you want to buy cheap photography gears which can provide you with wide and zoom range than choosing Sony Alpha a6000 with 16-50mm and 55-210mm Power Zoom Lenses is a great choice. Through this bundle pack than you can fulfil your passion need on shooting in a whole aspect about cityscape it self.
If I can suggest you with tips of how to shoot cityscape in a good way than you can follow this guidance:
- Set your camera on manual mode if you can use it properly or simply set it on auto mode when you want to use it in a simple way
- Put a wide range lens to give you huge impression of city images
- Wait for the moment and don’t be in a rush person
- Maintain about distortion or perspective error
- Consider to shoot before 10 am or after 4 pm
You also can consider to read this books too:
Shoot with Available Light
What’s better than having a giant light source that God gave to us, the sun light!
I know that off-camera flash technique is interesting especially if you want to make your photographs for more dramatic but I love available light since in the beginning of my career. Most of photographer think that only newbie who use available light during shooting but if you want to be a photographer than you must be able to shoot both with available and artificial light for sure.
When you consider to buy cheap photography gears for your first gear than using available light is the cheapest way for you to start shooting. All you need to do is wake up early and start before the sun goes down in a vertical way where you just get a flat image for whole time. As a photographer who shoot beach wedding for majority than I really the power of available light especially at early morning and during the sunset, it was outstanding!
Tips to Shoot with Available Light
The worse news about shooting with available light is you must be able to understanding how you camera works and how you know about photography theory. But the good news about this method is, there are thousand of people who able to shoot with available light better than with artificial light and the last thing that you can consider is, all present camera is great so they can adjust all the setting by it self and directly give you magnificent sharp and clean image for the result.
I’m not going to tell you that everything in photography will be as easy as making an omelet but down here are few guidance that you can follow to optimize your cheap photography gears on shooting with available light and use it to create stunning photographs:
- Start shooting early before 10 am and/or after 4 pm
- Don’t against the light but follow the direction
- Posing your object or person till the light shine towards them
- Don’t be so rush instead waiting for great momentum
- Learning more about exposure, it’s all about maintain the ISO, exposure time, and aperture
If you see two photos above than you will know why I love shooting on beach wedding and it’s all about the glamorous of the result. Sunrise is good but wait till you shoot on sunset scene than you gonna blown everybody’s mind. See the skin tone on the hands and faces, that all brilliant and looks so smooth and glamour without giving too much post production.
Just in case you don’t have any choice to shoot in the hot sunny day than I highly suggest you to buy round multi reflector for your own. In fact you gonna receive a reflector which come with various colour but when you release all the cover than you will have simple round with white smooth diffuser fabric which will reducing the sun light intensity and it seriously give a smooth illumination for your object.
11 Cheap Photography Gears to Start Your Photographer Career
There are thousand of cheap photography gears that might making you into overload informations and ended up without buying something that you really need for.
Since the past 10 years of working in wedding photography industry, I’ve been familiar with two camera brand, Nikon and Canon so before I break down all these 17 lists than you may consider to read my previous post about:
- Cheap Wedding Photography Equipment for Canon User That Less Than $2500
- 7 Nikon Wedding Photography Gear On a Budget Less Than $2500
My Personal Suggestion of Choosing Your 1st Photographer Gears
I know exactly how is the feeling on that situation but if I can give you a short suggestion than go believe in your self. Hearing what other people said will just let you down and doesn’t affected to your achievement. Choosing your first photography gears will seems to be challenging but if you know for what you need for the most than you will get your answer in very soon.
1 – Best Mirrorless Camera Under $1000
Even buying the DSLR still rely on this 21st century because I personally use them on my wedding session but if you concern on simplicity and latest technology than you might thinking about mirrorless camera that cost less than $1000.
Believe it or not I still bring my Canon EOS M as a back up camera, I know it looks like tiny camera but if you ever work with it than you will know how gorgeous this camera is. M series provide various well collection, one of them are sell in body only and the rest is being sell bundle with one or two great lenses.

2 – Canon EF-M 22mm f2
This Canon EF-M 22mm f2 is superb fixed lens that you can concern with, it seriously small but it will help you to make a stunning image for sure. Wait until you set the aperture on f2 and you definitely see how sharp it is and give you great blur background especially when you shoot for portrait or details.
3 – Canon EF-M 18-55mm f3.5-5.6
If you gonna work in photography job than following you buy the fixed premium lens than it will better if you have a wide range lens too. Here in M series collection than Canon EF-M 18-55mm f3.5-5.6 is rely for all your needs. 18mm range is awesome to shoot for landscape, cityscape, documentary, or even some ceremony with more journalistic style.
This heritage building below is taken using Canon EF-M 18-55mm f3.5-5.6 and I feel satisfy with the result for sure.
4 – Speedlight
I work with available light in majority but having Canon Speedlite 580EX II inside my bag is really helpful when I have a situation with less light intensity. During this time I do two kind of technique while using my speedlight, there are on-camera flash and off-camera flash. In a simple words on-camera flash is technique where you put your speedlight on your camera hot shoe and off-camera flash is a technique where you can fire up your speedlight in a separate position like using tripod or simply by holding it on your hand.
Just in case you want to learn how I shoot with off-camera flash technique than you can read my article on Outdoor Flash Photography Technique for Shooting Wedding.
5 – Memory Card
At the present time I use both SD card and CF for all my cameras and I will bring at least 3 of them on every wedding session that I have. When you using brand new photography gears than you might consider on present memory card called XQD card, I use it on Nikon Z7!
6 – Card Reader
Even all camera brand will provide you with a transfer wire but I still suggest you to buy your own card reader like Unitek or GIKERSY because you definitely could buy this cheap photography gears for less than $20 and surely a lot of options that you can have on the online store.

7 – Microphone
When you work as a photographer and content creator than I surely suggest you to but a microphone because it helps you so well on reducing outdoor noise while recording for online class or daily photographer life.

Rode VideoMicro is one of most recommended microphone for making video or create a content on Youtube, it comes with great light weight materials and works well both indoor and outdoor. Wind is one taught thing that you must be concern and when you don’t use it while record for something than the noise will really disturbing your video result.
When you want to buy cheaper microphone for your own uses than you may read my recommendation on 7 cheap vlog microhone.
8 – Dimmable LED Light
I wish I could have this kind of artificial light when I learn photography back 10 years ago because it is really simple and works well for any newbie photographer who don’t know exactly how to see the light direction. Dimmable LED light like CN-160 Dimmable Light is really taught, I brought it to Bali, Maldives, and any other cities where I got a photo session and it works well both for outdoor and indoor.
This photo below is taken during my pre wedding in Maldives, it was quite dark following the sunset golden time so what I’m doing is asking my couple to stand together and holding my CN-160 Dimmable Light to give more light into their face and boom…the magic happened!
9 – Tripod
I bring tripod almost on every photo session that I have, for sure I’m not using it when shooting on ceremony or party but I will use it when making a still video of behind the scene instead I bring my stabilizer. I personally use Velbon DV7000 for my work and it’s been 5 years working with this cheap photography gears that you also can buy.
It’s quite heavy (3,47kg) but good if you using a heavy weight professional camera for your job. This Velbon DV7000 can be adjust for around 1,6 meter and quite strong when you taking picture on an extreme location like rock, coral, or in the mountain.

10 – Flexible Tripod with U Holder
I love making a photography tutorial and sometimes I use my phone to record the behind the scene in a simple way. Using Ubeesize Tripod S is good thing that you can do when you work as a film maker or content creator, you can adjust this flexible tripod no matter where you are and it made from strong rigid material for any situation.

11 – Blower
Last cheap photography gears that I will recommend you to have is a blower, you can but it just the blower or bundle with other cleaning kit like smooth fabric and sanitizer. I bought this classic camera and lens blower below since in the beginning of my career and it cost less than $10, so cheap for great function!


